
| Welcome | Movies | Images | PDFs | Photokit |
Movies |
||
|
To view these movies you will need QuickTime which is available to download for free here - http://www.apple.com/quicktime/. |
||
Photoshop CS5 movies |
||
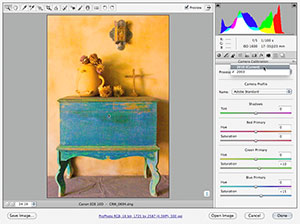 |
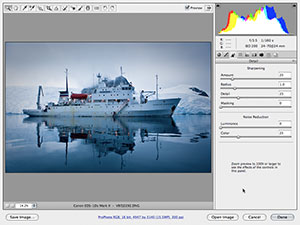
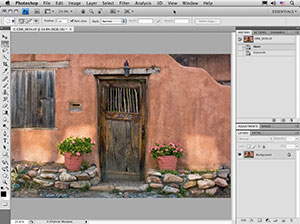
Process Versions in Camera Raw Camera Raw 6 now provides the option to choose between two Process Versions: 2003 and 2010. This movie explains the reasons why this was done and demostrates the advantages offered when using Process 2010, particularly with regard to the Detail panel sharpening and noise reduction. |
|
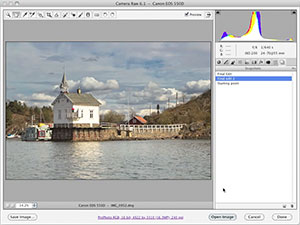 |
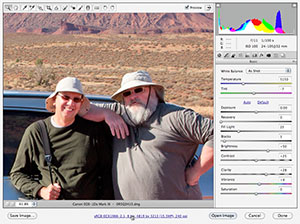
Basic image processing in Camera Raw With so many tools and ways to edit photographs in Photoshop, it is easy to get confused when working out what is the best way to edit an image in Photoshop. At the end of the day we find that 90% of the photographs we take can mostly be improved by applying a standard series of steps. We do this all in Camera Raw when processing our raw photos, because we find it to be the most efficient workflow available. |
|
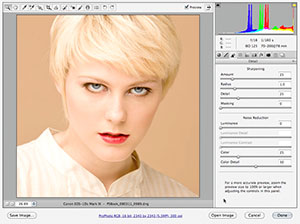 |
Portrait Sharpening This is the second of three videos showing how to use capture sharpening in Camera Raw. Using a portrait of Courtney shot by Martin, Jeff shows how to adjust the sharpening parameters–particularly the edge masking–to get the optimal sharpening result for portraits (or images with low edge frequency). |
|
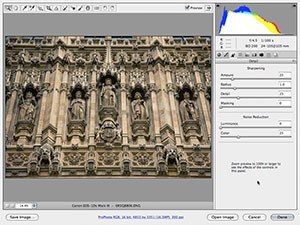 |
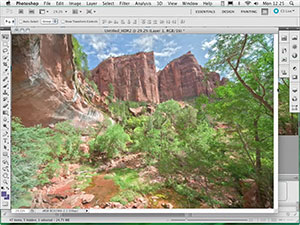
Landscape Sharpening Capture sharpening, part of the sharpening workflow as advocated by author and imaging expert Bruce Fraser is now part of an integrated tool in Camera Raw. This video shows how to approach “landscape” sharpening–or images with high frequency edge detail. This demo shows how to use the parameter preview to see exactly what you are doing and how to adjust the sharpening settings to bring out the best image detail your image can provide. This is part 1 of 3 sharpening videos. |
|
 |
Smart Object sharpening blend If you find yourself working on an image that has a mix of both high and low edge frequency, what are you supposed to do? The best way is to blend two different capture sharpening together to get the best of both solutions. An easy way to do this is by opening the images from Camera Raw into Photoshop using Smart Objects. You can then optimize the sharpening for each edge frequency and blend them together using layers masks. |
|
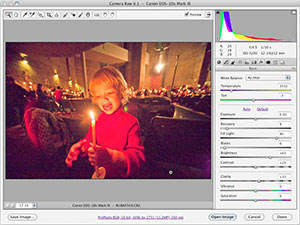 |
Adobe Camera Raw noise reduction The Camera Raw noise reduction was much improved in Photoshop CS5. This movie briefly shows you how to make the most of the main controls in Camera Raw. It also shows how you can further refine stubborn noise by using the Dust & Scratches filter in Photoshop. |
|
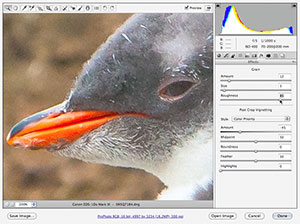 |
Adding grain in Camera Raw Camera Raw 6 also allows you to add grain via the new Effects panel section. In this movie I show how small amounts of grain can be added in conjunction with the adjustments applied to the sharpening and noise reduction, in order to produce an optimum rendering from a high ISO raw file. |
|
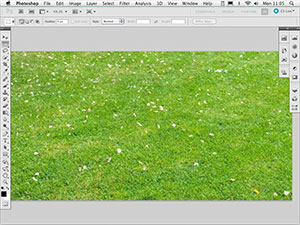 |
Content-Aware Filling The Content-Aware fill feature can be useful for a number of tasks. In this movie I show how one can combine using a Color Range selection with the Content-Aware fill command to quickly eradicate flower petals from a grass lawn. |
|
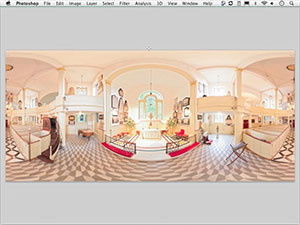 |
Creating 360° Panoramas Although Photoshop is not intended to be used as a tool for creating spherical panoramas, the align technology in Photoshop has been suitably improved that it can be used to create 2D images that show a flattened view of a complete spgherical panorama. Following on from this you can use the 3D tools in Photoshop to manipulate a spherical panorama image. |
|
 |
Merge to HDR Pro image editing The latest Merge to HDR Pro feature is a big improvement upon the previous Merge to HDR. This movie shows how you can manipulate the Merge to HDR controls to successfully blend 3 bracketed exposures to create a single HDR image. In addition, this movie shows how you can add a single image exposure layer to tame the colors in the mast HDR image. |
|
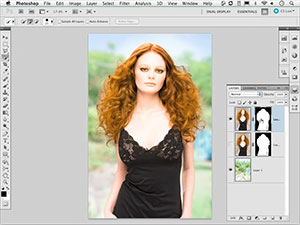 |
Using Refine Mask to mask hair The new Refine Mask command can now be used to carry out sophisticated masking of objects. In this movie you can see how it is possible to use the Refine Mask controls to produce a cutout image of a model against a canvas backdrop and place her against a new background image. |
|
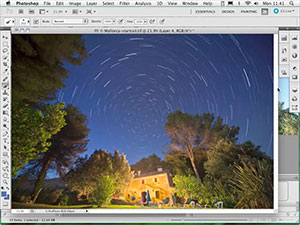 |
Creating star trail images Star trail images have traditionally been captured by using a long time expsoure to record the rotation of the earth relative to the night sky and thereby create what is commonly known as a star trail image. This movie tutorial shows how the technique can be adapted to combine multiple separate exposures in order to produce a smooth-looking image in Photoshop. |
|
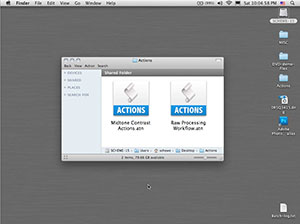 |
How to load Actions If you check the Extras folder on the DVD, you will find a couple of Action sets that have been supplied for you to experiment with. This movie runs through the process of how to load these Actions into Photoshop and also how to customize the action steps for your computer setup. |
|
 |
A simple Camera Raw batch Action Now that you have seen how to load pre-supplied actions, this movie shows how to go about recrding a simple Camera Raw processing action. |
|
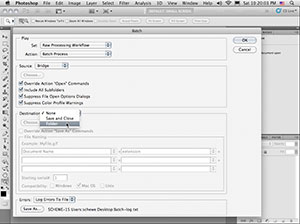 |
Batch process actions Following on from the previous movie example, this tutorial shows how you can create more complex Actions, such as a batch process Action that can be used to create different types of file outputs from a single or multiple original master files. |
|
 |
A print workflow This series of movies is all about the steps required to achieve the best quality prints out of Photoshop. Movie 1 shows how to apply an optimum sharpening for print output. Movie 2 shows how to go about soft proofing an image in Photoshop and make corrections to compensate for tonal and color changes that may occur in the print profile conversion process. Lastly, Movie 3 runs through some of the new features in the Photoshop CS5 Print dialog. Print workflow 1 movie |
|
|
||
 |
Removing foreground objects Don’t you hate it when street signs or overhead cables get in the way of a great view? Here is an easy way to get rid of offending foreground objects, although to use this technique you will need to shoot several frames of your subject and step slightly to the left or right between each exposure. To process these photographs in Photoshop, all you have to do is choose the two best frames. All you will need is enough displacement between the two shots to achieve a clear view of the main subject behind whatever objects are in front of it. |
|
 |
Adding grafitti to a wall In this movie I demonstrate how to add graffiti text to a wall and create a convincing blend between the lettering and the texture of the wall. The Displace filter is not the most intuitive of filters but in this movie I show how it is still quite invaluable if you need to distort a layer so that it appears to match the shape or texture of the underlying layers. |
|
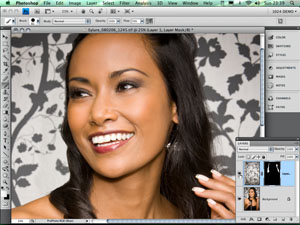 |
Removing loose hairs Here is an interesting challenge that I was presented with recently. I shot the model shown on these pages for an advertising job and was asked by the client to make sure that the skin tone and nails looked flawless. After they had seen the initial retouch work they also asked if I could clean up the hair outline. At first it looked like this would be impossible to achieve. After all, how on earth can one use the clone stamp or healing brush to tidy up the fine hair strands against a background which consisted of a busy wallpaper pattern? As it turned out, the solution to this problem was staring me in the face! |
|
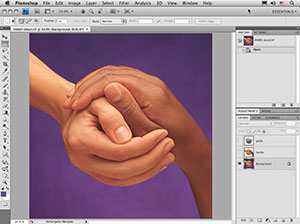 |
Globe hands Photoshop doesn’t need layers!!! Not when you know how to use the History feature of Photoshop. This demo is the basis of the History feature as written by Mark Hamburg for Photoshop 5.0 (when History was added). This demo shows you how to set up and use Snapshots and snapshot painting to creatively blend images together–and you don’t need layers (although they do come in handy). |
|
 |
Adding water droplets Suppose you need to add extra water droplets to a photograph so that they match those in the original photograph? In this movie I show how to create a custom layer style ad combine this with a custom brush shape to produce water droplets that you can actually paint onto a photograph in Photoshop. |
|
 |
Photoshop weightloss You know how the camera always seems to add 10 lbs. to you? You can shave those extra pounds away using Photoshop. This demo shows two methods of making people look thinner. And, if you do it with subtlety, you’ll never know that is was Photoshop that took those extra pounds off–and your clients will think you are a genius! |
|
 |
Color to black and white Yes, there are already a lot of ways to convert a color image to grayscale in Photoshop. But all of them except this technique mean your image is converted as a global correction. Using color channels as grayscale layers means you can use layer masks to alter the grayscale conversion and allows you to optimize for the best possible result. The technique allows shows how to re-convert your grayscale image back to a color image for the purposes of color toning. |
|
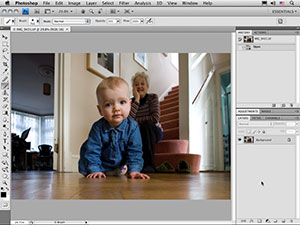 |
Progressive blurs Jeff did this shot of Martin’s daughter Angelica and while it’s nice, the edges of the image are distracting. So, Jeff demos how to add multiple Box Blurs to simplify the background and cut the clutter away. It’s a simple technique that can help many images. |
|