
Spot healing brush
|
||||||||||
 |
Figure 1 The spot healing brush Options bar.
Proximity match mode
The spot healing tool has three basic modes of operation (see Figure 1 for the spot healing brush tool Options bar). The Proximity Match mode analyzes the data, around the area where you are painting, to identify the best area to sample the pixel information from. It then uses the pixel data that has been sampled in this way to replace the defective pixels beneath where you are painting. You can use the spot healing brush in this mode to click away and zap small blemishes, but when you are repairing larger areas in a picture you will usually obtain better results if the brush size used is smaller than the defective area. And because the brush is intelligently looking around for the good pixel data to sample from it is best to apply brush strokes that drag inwards from the side where the best source data exists (see Figure 2).
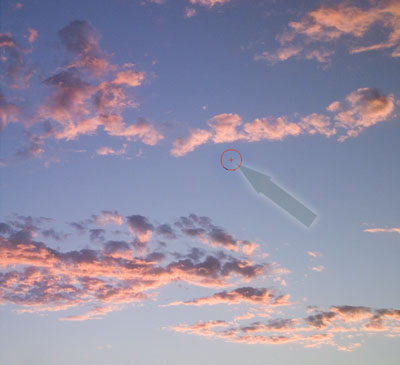 |
Figure 2 In Proximity Match mode, the spot healing brush works by searching automatically to find the best pixels to sample from to carry out a repair. It is a good idea when using this tool to retouch larger areas, for the brush direction to be coming from the side that contains the most suitable texture to sample from. This will give the spot healing brush a better clue as to which areas to sample.
The Create texture mode works in a slightly different fashion. The spot healing tool will read in the data surrounding the area you are attempting to repair. As you do this it will generate a texture pattern from the sampled data. So the main difference between this and the Proximity Match mode is that Proximity Match repairs and blends using actual pixels, while Create Texture repairs and blends using a texture pattern that has been generated on-the-fly.
The spot healing brush also features a Content-Aware mode which intelligently works out how best to fill the areas you retouch when you use the spot healing brush.
Let’s now look at what the spot healing brush is capable of when used in this mode. In the Figure 3 example below there were a lot of electric cables and wires in the original photograph that spoiled the view. By using the spot healing brush in content-aware mode I was able to carefully remove all of these to produce the finished photo shown beneath the original. Although the end result was quite effective I should point out that you do still have to apply a certain amount of skill in your brush work and choice of settings in order to use this tool effectively. To start with I found that the Normal blend mode worked best for retouching the cables that overlapped the sky, since this blend mode uses diffuse edges to blend seamlessly with the surroundings. I also mostly used long, continuous brush strokes to remove these from the photograph and achieve a smooth blended result with the rest of the sky. When retouching the rocks I applied much shorter brush strokes using the Replace blend mode to gradually removed the cables bit by bit (see the blend modes shown in Figure 4). I find that you need to be quite patient and note carefully the result of each brush stroke before applying the next. You’ll discover that dragging the brush from different directions can also influence the outcome of the heal blend retouching and you may sometimes need to carry out an undo and reapply the brush stroke differently and keep doing this until you get the best result. I also find that you can disguise the retouching better by adding extra, thin light strokes 90° to the angle of the first, main brush stroke and this too can help disguise your retouching work with the spot healing brush used in this mode.


Figure 3 This shows a before version (top) and after version (bottom), where I had used the spot healing brush in Content-Aware mode to retouch this photo.

Figure 4 The spot healing brush Options bar with the Content-Aware mode selected. You can see here the various modes available for the spot healing brush.
Healing brush 
The healing brush enables you to clone areas from an image and blend the pixels from the sampled area seamlessly with the target area (the healing brush Options bar is shown below in Figure 5). The basic principle is that the texture from the sample area is blended with the color and luminosity surrounding wherever you paint.
 |
Figure 5 The healing brush Options bar.
The healing brush in use
The healing brush is used in the same way as the clone stamp tool. However, it is important to stress that the healing brush is more than just a super clone stamp and it has its own unique characteristics. So although it is similar to the clone stamp, you will need to take these differences into account and adapt the way you work with it. To begin with, you establish a sample point by Option/Alt-clicking on the portion of the image you wish to sample from. Release the Option/Alt key and move the cursor over to the point where you want to clone to and click or drag with the mouse to carry out the healing brush retouching.
The healing brush performs its magic by sampling the texture from the source point and blends the sampled texture with the color and luminosity of the pixels that surround the destination point. The healing brush reads the pixels within a feathered radius that is up to 10% outside the perimeter of the healing brush cursor area. By reading the pixels that are outside the cursor area at the destination point, the healing brush is able (in most cases) to calculate a smooth transition of color and luminosity within the area that is being painted (always referencing the pixels within a feathered radius that is up to 10% outside the perimeter of the healing brush cursor area). It is for these reasons that there is no need to use a soft edged brush and you will always obtain more controlled results through using the healing brush with a 100% hard edge.
Once you understand the fundamental principles behind the workings of the healing brush, you will come to understand why it is that the healing brush may sometimes fail to work as expected. You see, if the healing brush is applied too close to an edge where there is a sudden shift in tonal lightness then it will attempt to create a blend with what is immediately outside the healing brush area. So when you retouch with the healing brush you need to be mindful of this phenomenon, but there are things you can do to address this. For example, you can create a selection that defines the area you are about to start the retouching on and constrain the healing brush work to inside the selection area. Or, this might be a situation where it would be better to use the spot healing brush in Content-Aware mode. To see examples of the healing brush and the patch tool in action, check out some of the repairing and retouching examples found in Chapter 8.
 |
|
 |
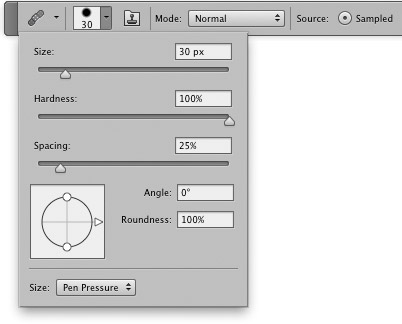 |
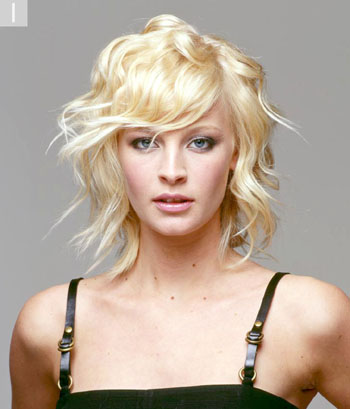
1 The healing brush retouching can be carried out on the Background layer, on a copied Background layer or an empty new layer. In this example, I selected the healing brush from the Tools panel and edited the brush style to create a hard edged brush. The brush blending mode should be Normal, the Source radio button checked and ideally the Aligned box left unchecked.
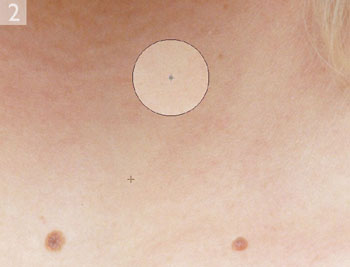 |
2 To use the healing brush I Option/Alt-clicked to define the source point, which in this example was a clean area of skin texture. I was now ready to retouch with the healing brush. In the example shown here, I simply clicked on the blemishes to remove them with the healing brush. If you are using a pressure sensitive tablet as an input device, then the default brush dynamics will be size sensitive. You can use light pressure to paint with a small brush, and use heavier pressure to get a full-sized brush.
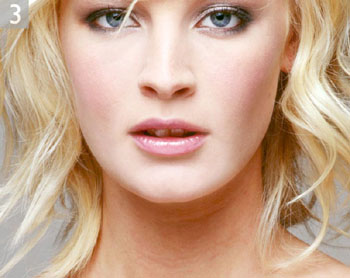 |
3 I continued using the healing brush to complete the skin tone retouching. In this example I sampled one pixel source point for the chest and neck areas and another to retouch the face.
