
Crop tool
|
||||||||||||||||||||


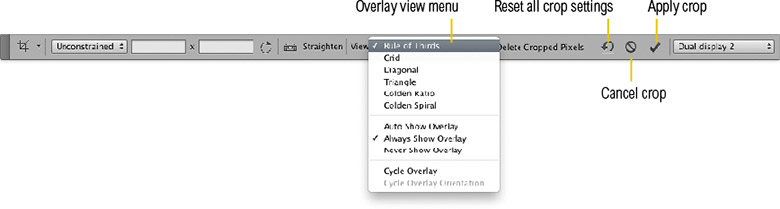 |
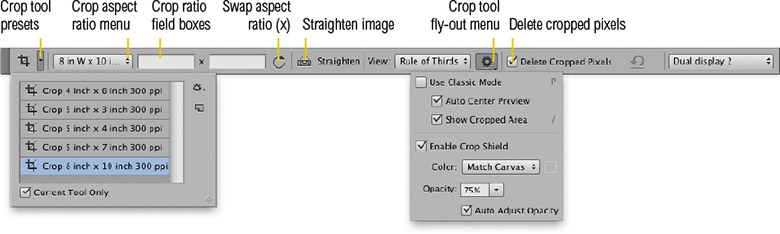
Figure 5 The crop tool Options bar shown here in ‘active crop’ mode. After you have dragged with the crop tool and before you commit to the crop, the tool Options bar will change (as shown here) to the crop modal state. To apply a crop, you can click on the Apply Crop button, double-click inside the crop area or hit the Enter or Return keys. To cancel a crop, click on the Cancel Crop button or hit the Esc key.
Shield color options
The shield color settings can be adjusted via the Crop options fly-out menu shown in Figure 6 (to see how to access this, refer to Figure 3). The default shield color is a light gray, though you can set this to anything you like, such as black at 100% opacity. You can also hide/show the crop outline by using the View menu  Hide Extras command.
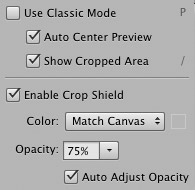
Figure 6 The Crop options fly-out menu.
Current Image cropping
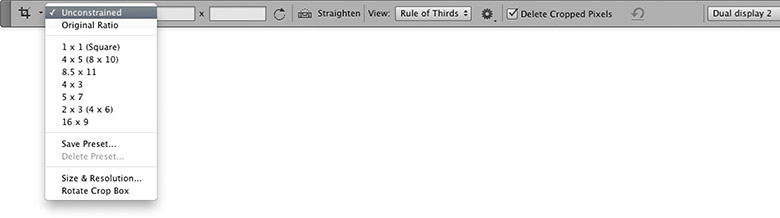
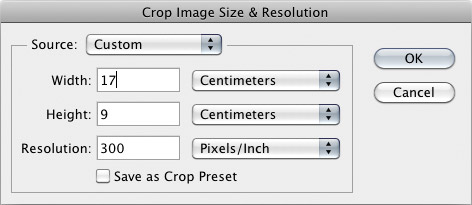
If you want a crop to match the dimensions and resolution of a document that is already open in Photoshop, click on that document to make it active. Then go to the Crop Aspect Ratio menu and open the Crop Image Size & Resolution dialog shown in Figure 7. You will then need to go to the Source pop-up menu at the top and select ‘Current Image’. This loads the current image dimensions and resolution settings into the boxes below. Click OK to apply this as the new Crop setting. Now select the image you wish to crop and as you drag with the crop tool, this new crop setting will be applied. When you OK the crop, the image size will adjust to match dimensions and resolution of the previously selected image.

Figure 7 This shows how to select ‘Current Image’ as the new crop target setting.
Selection-based cropping
To make a crop base on a selection, all you need to do is select the crop tool (C) and the crop will automatically fit to the selected area. For example, you might want to command/control-click a layer to make a selection based on a single layer and then execute a crop (as described below in Figure 8). You can also make a crop based on an active selection by choosing Image Crop. When you do this the crop tool automatically matches the bounds of any selection. Where a selection has an irregular shape, the crop is made to the outer limits of the selection and the selection retained.
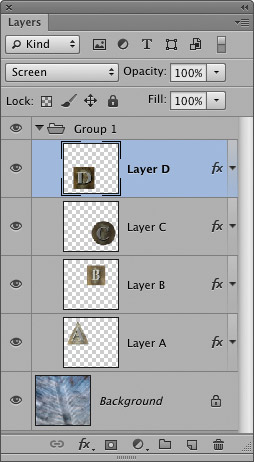

Figure 8 Sometimes it is quicker to make a crop from a selection rather than try to precisely position the crop tool. In the example shown here, if I wanted to make a crop of the box containing the letter D, the quickest solution would be to Command/Control-click on the relevant layer in the Layers panel and select the crop tool (C), or choose Image Crop.
The crop tool in use
To apply a crop, simply drag the crop tool across the image to marquee the area you want to be cropped. You can then refine the position of the crop by directly dragging any of the eight crop handles. Note that if View Snap To Document Bounds is checked, the crop tool will snap to the edge of the document. To avoid this, go to the View menu and uncheck the Document Bounds or general Snap To behavior.
To constrain the proportions of the crop, hold down the Shift key as you drag. You can reposition the crop without altering the crop size by dragging within the crop area. And to rotate the angle of the crop, move the cursor anywhere just slightly outside the crop window. The crop bounding box also has a movable center point. When you click and drag the center point elsewhere, the central axis of rotation is repositioned accordingly, even to a point outside the crop rectangle.
The crop tool cursor icons
When a crop is active, you will see the cursor change appearance as you roll over different parts of the crop bounding box. See Figure 9 below for more details.
 |
Note: if you hold down the Option/Alt key as you drag on a side bar or corner handle, this will center a crop adjustment around the center point. |
|
Figure 9 This shows the different cursor icons you will see when rolling the mouse over the crop tool bounding box. The center point can be repositioned to set the central axis of rotation. Also, holding down the Shift key and moving a corner point preserves the aspect ratio. |
|
 When the cursor is placed on a mid point box, this allows you to adjust crop size vertically or horizontally.
 When the cursor is placed inside the bounding box, this allows you to move the whole cropping area.
 When the cursor is positioned anywhere outside the crop box this will allow you to rotate the crop.
Big data
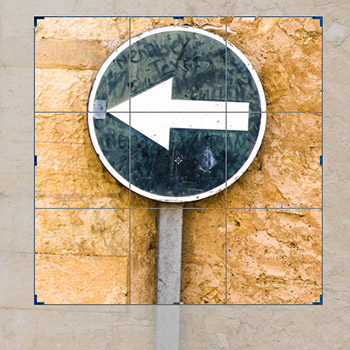
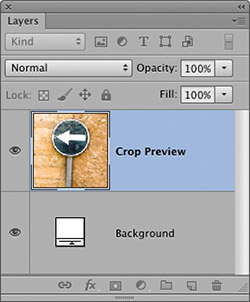
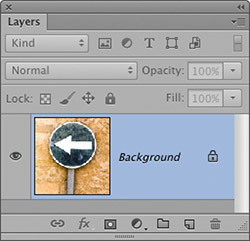
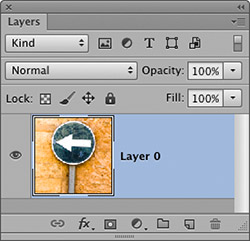
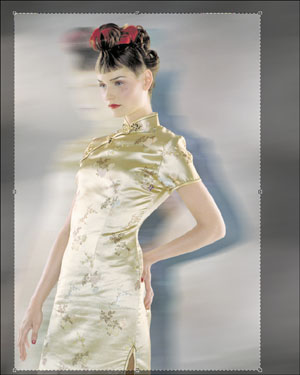
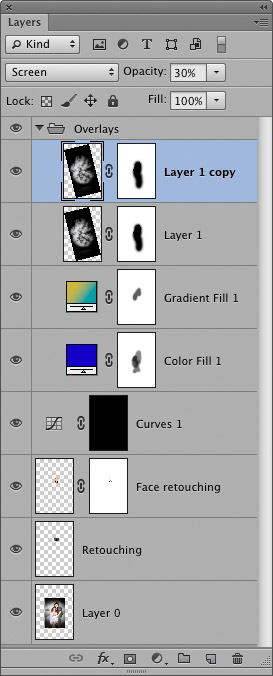
The Photoshop PSD, PDF and TIFF formats all support ‘big data’. This means that if any of the layered image data extends beyond the confines of the canvas boundary, it is still saved as part of the image when you save it, even though it is no longer visible. If you have layers in your image that extend outside the bounds of the canvas, you can expand the canvas to reveal all of the big data by choosing Image Reveal All. Remember though, the big data can only be preserved providing you have saved the image using the PSD, PDF or TIFF formats. Also, when you crop an image that contains a normal, non-flattened background layer and the ‘Delete Cropped Pixels’ box is unchecked, Photoshop automatically converts the background layer to a Layer 0 layer (and preserves all the big data).
 |
||
 |
 |
 |
|
Figure 10 The cropped version of this picture contains several layers which when expanded by using the Image |
||
Trimming an image
The Image Trim... command can be used to crop an image based on pixel color values. Figure 11 shows an example of how the Trim command can be used to crop an image based on transparency.
 |
|
 |
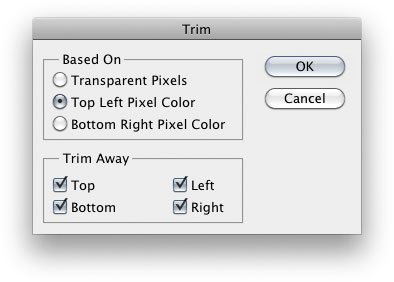 |
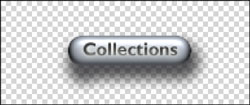
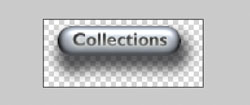
Figure 11 In this example the Image Trim… command is used to crop the image based on transparency. Photoshop crops all four edges, removing the transparent contents only.
I find that it is very useful to save the crop sizes that you use regularly as crop tool presets via the Tool Presets panel (Figure 12). If the tool preset contains a resolution setting, then the crop will resize the image to fit the resolution (the number of pixels per inch) and the dimensions. To read more about image resolution, see Chapter 5 in the book.
If the resolution field is left blank, the crop will be made to fit the image dimensions and the number of pixels per inch will adjust accordingly. Note that you only need to save one preset for landscape and portrait crops. Just click on the double arrow between the width and height fields to switch them.
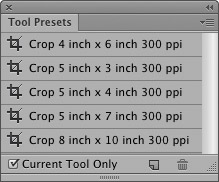 |
Figure 12 The crop tool presets are shown here listed in the Tool Presets panel.