Clone Source panelThe Clone Source panel is useful when retouching with the clone stamp and healing brush tools. This is because it allows you to see a preview of the alignment of the pixels that you are about to clone with. All the other features, such as the multiple sample points are really of more use for people working in video editing, where it is desirable to store multiple clone sources when you want to clone in exact registration from one frame to another across several images in a sequence.
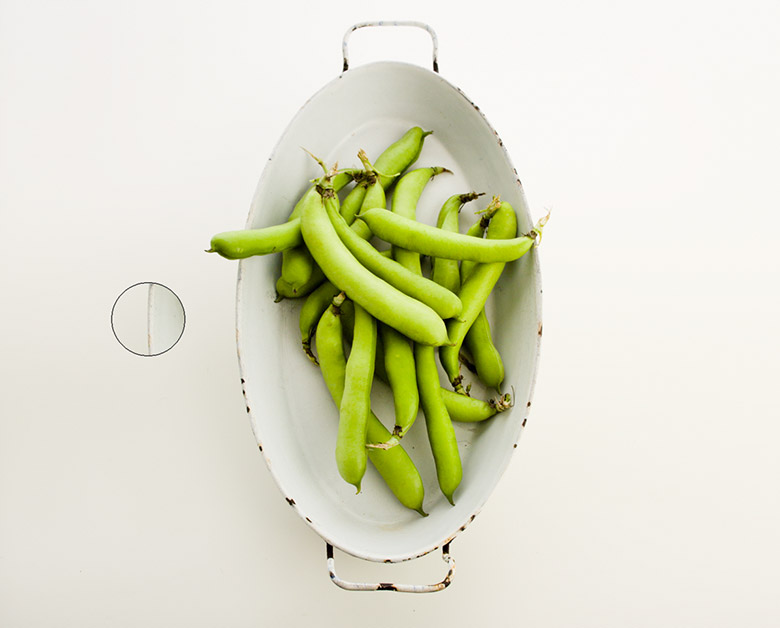
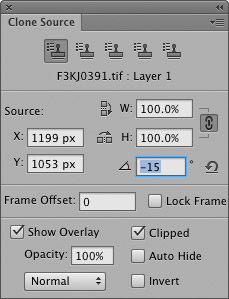
2 I then went to the Clone Source panel and adjusted the angle. The best way to do this is to double-click to highlight the angle field, place the cursor over the area to be cloned and with the Shift key held down adjust the angle value up or down with the keyboard arrow keys.
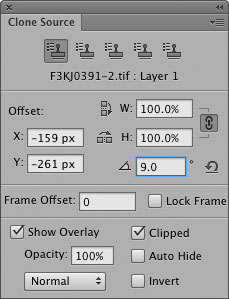
3 After making a first successful clone it was necessary to double-click the angle field again to make it active, position the cursor and once more adjust the angle. 
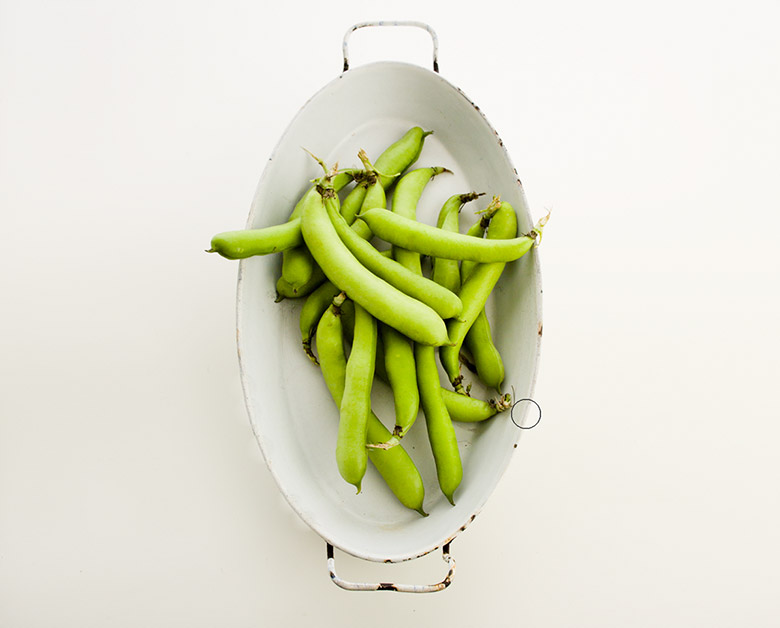
4 Here you can see the finished result. Getting the angle just right each time can be quite tricky, so patience is required. Finally, I added a layer mask and painted on this with black to mask the outer bottom left edge of the bowl. |