Background eraser tool 
The background eraser tool erases the pixels based on the pixel colors sampled by the tool. The sampling options are accessed via the buttons in the Options bar next to the brush preset picker (Figure 1). These allow you to sample ‘Continuous’ to continually update the sample color as you drag, or ‘Once’ to erase pixels based on the pixel color value of where you first clicked. And finally ‘Background Swatch’, which will enable you to erase based on the background swatch color set in the Tools panel.
The erase limits are accessed via the Limits menu in the Options bar, which can be set to Discontiguous or Contiguous, while the Find Edges mode limits the erasure to contiguous pixels but is better at preserving the edge sharpness. The Tolerance setting is like the magic wand tolerance and the percentage setting entered here will determine the range of pixel values that will be erased.
The Protect Foreground Color option can be used to sample a color from inside the area you are making the cutout, so that when this box is checked, the background eraser will protect the color that is selected here from being erased.
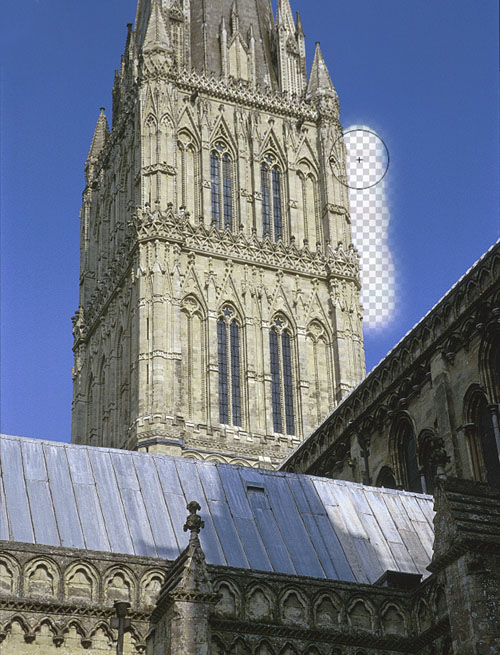
Figure 2 shows an example of the background eraser tool in action.
Figure 1 The background eraser tool Options bar.
Figure 2 The background eraser tool provides more precise control than the basic eraser tool. In this example, the background eraser tool was set to erase sampling ‘Once’ and in Find Edges mode. This meant that when I clicked and dragged, all pixels within a specified tolerance of the pixel value where I first clicked were erased by the tool. Or if using a pressure sensitive stylus, the tolerance would be determined by the pressure applied by the stylus. The background eraser can also erase the background sample color from the edge pixels – this can help remove the color contamination as you erase and the Find Edges mode preserves the edge sharpness better.