Quick selection tool 
The quick selection tool is like the magic wand tool, it can be used to make selections based on pixel color values, except the quick selection tool is a little more sophisticated than the standard magic wand and hence, has been made the new default tool in this particular tool grouping.
I don’t know about it being quick, but quick selection is certainly a more sophisticated kind of selection tool that has smart processing capabilities. You can use it to make a selection based on tone and color by clicking or dragging with the tool to define a portion of the image that you wish to select. You can then keep clicking or dragging to add to the selection without needing to hold down the Shift key as you do so. And you can subtract from a quick selection by holding down the Option/Alt key as you drag. But what is clever about making quick selections is that it remembers all the successive strokes that you make and this will provide stability to the selection as you add more strokes. So as you toggle between adding and subtracting, the quick selection is temporarily storing these stroke instructions to help determine which pixels are to be selected and which are not. Sometimes you may find it can help if you make an initial selection and then apply a succession of subtractive strokes to define the areas you don’t want to be included. You won’t see anything happen as you apply these blocking strokes, but when you go on to select the rest of the object with the quick selection tool, you should find that as you add to a selection, the blocking strokes you applied previously will help prevent leakage outside of the area you wish to select. This aspect of quick selection behavior can help you select objects more successfully than was ever possible before with the magic wand. However, as you make successive additive strokes to add to a selection and then erase these areas from the selection, you will have to work a lot harder going back and forth between adding and subtracting with the quick selection tool. In these situations it can be a good idea to clear the quick selection memory by using the ‘double Q trick’. If you press the  key twice, this will go to Quick Select mode and back to selection mode again. The stroke constraints will be gone and you can then add to or subtract from the selection more easily since you have now cleared the quick selection memory. The quick selection tool Options bar is shown in Figure 1 below.
 |
Figure 1 The quick selection tool Options bar.
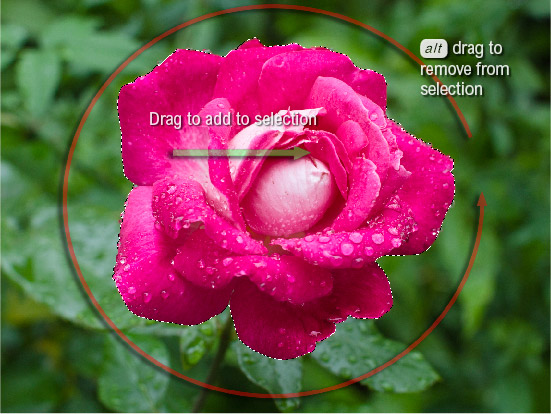
1 In this example, I selected the quick selection tool, checked the Auto-Enhance edge option and dragged to make an initial selection of the flower. Then, with the Option/Alt key held down, I dragged around the outer perimeter of the flower to define the areas that were not to be excluded from the selection. I then continued clicking and dragging to select more of the flower petals to fine-tune the selection edge.
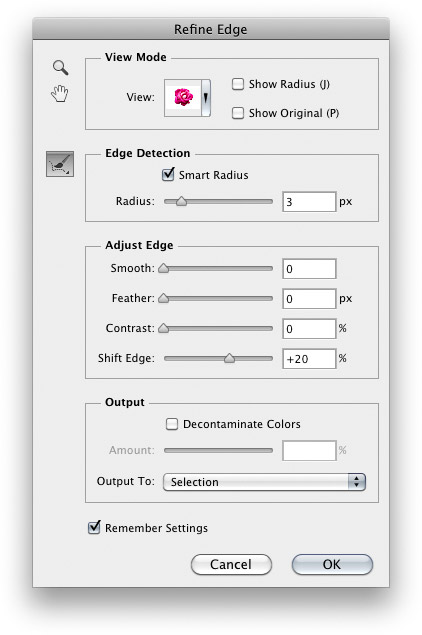
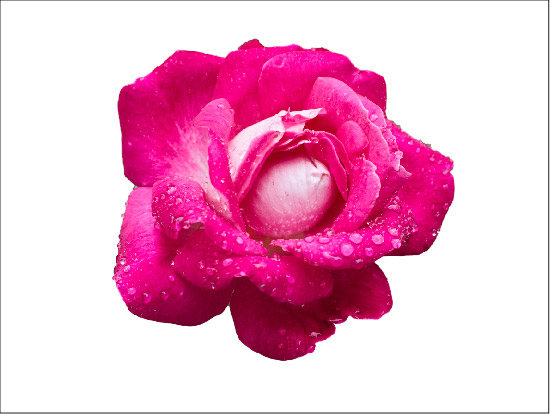
2 I then clicked on the Refine Edge button and selected the ‘on white’ mask option to display the cutout selection against white.
3 In the Edge Detection section I applied a 3 pixel Radius with the Smart Radius option checked. I also expanded the edge slightly, applying a +20% Shift Edge amount.