Paths panelWhile alpha channel masks use pixels to describe their contents, paths use mathematical descriptions to define lines, outlines, or shapes. The advantage of a path is that it is resolution independent and infinitely editable. Paths can be imported from a vector drawing program such as Adobe Illustrator, or they can be created within Photoshop using the pen path or shape tools. A freshly drawn path is always displayed as a work path in the panel window (see Figure 1 below). If you don't wish a current work path to be overwritten, it should ideally be promoted to become a normal path (double-click the work path or drag it down to the New Path button) A path can be used in several ways: to convert to a selection; apply as a vector layer mask or save as a clipping path in an Encapsulated PostScript (EPS) or TIFF file. I mainly use paths whenever I need to define an intricate outline that I can then convert to a selection. For professional quality outline selections I strongly urge you to ditch the lasso tool in favour of the pen tool. This is because the pen tool is more efficient to use, plus you can easily edit a pen path and make corrections at any time.
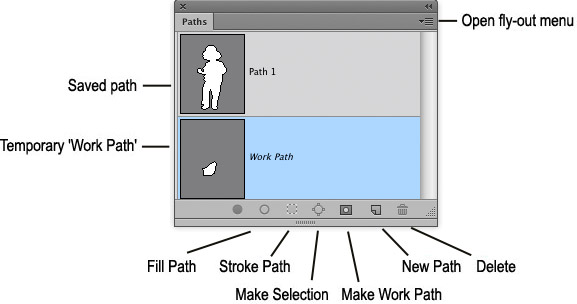
Figure 1 The paths panel. To fill a path with the foreground color, click on the Fill Path button. To stroke a path, click on the Stroke Path button. The stroke will use whichever tool and brush setting is currently associated with that tool (see Figure 2 below).
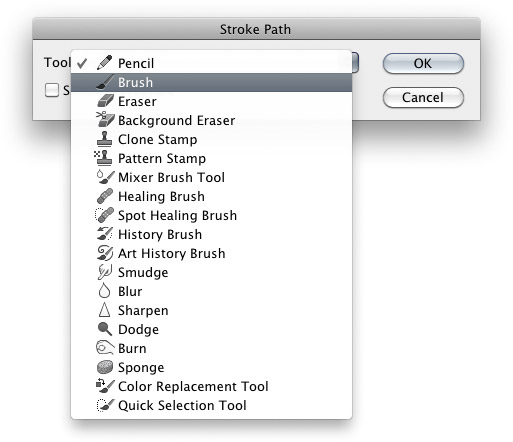
Figure 2 The Stroke Path button will use whichever tool has been selected in the Stroke Path options and also whichever brush setting is currently associated with that tool. To open the Stroke Path options, mouse down on the fly-out menu button and select the Stroke Path... item. To convert a path into a selection, click on the Make Selection button. To convert an active selection to a path, click on the Make Work Path button. |