
Ruler tool
|

 |
Figure 1 Here is a view of the ruler tool options bar where I made a measurement with the ruler tool. The x y readouts indicate the start point coordinates for the ruler tool measurement and the W and H readouts indicate the width and height of the ruler measurement. The units displayed here use whatever units are currently set for the ruler preferences. Note that the ‘Use Measurement Scale’ option is only available in the extended version of Photoshop.
 |
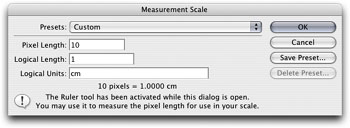 |
Figure 2 Here is another view of the ruler tool options panel for the Extended version of Photoshop. In the example shown here the ‘Use Measurement Scale’ option was checked. In this mode, the ruler tool displays the measurement units using the Measurement Scale settings. This can be accessed by going to the Image menu and choosing Analysis  Set Measurement Scale Custom… You can use this dialog to create a custom measurement scale setting where logical unit lengths can be given a name such as inches or pixels and you can set the pixel length for each unit of the logical scale. In the example shown here, I created a setting where 10 pixels equaled a 1 cm unit of length.
Protractor mode
The ruler tool also has a protractor mode. After drawing a measuring line, Option/Alt-click on one of the end points and drag out a second measuring line. As you drag this out, the angle measurements are updated in the ruler tool options bar and Info panel. Note that the ruler tool line only remains visible when the tool is selected (or you can hide it with the View Hide Extras command). The ruler tool line can be updated at any time by clicking and dragging any of the end points. And as with other tools, the ruler tool can be made to snap to the grid or guides.
Straightening images
With previous versions of Photoshop, the ruler tool could be used to measure the angle of say, an horizon in a photo and use this measured angle to rotate the image choosing Image Image Rotation Arbitrary. You can still use this method if you wish, but it is now much easier to simply select the straighten tool from the crop tool Options bar, as described below.
Straightening images using the crop tool
To apply a precise image rotation, you can click to select the straighten tool from the crop tool options bar and drag across the image as shown below in Figure 3.
![]()
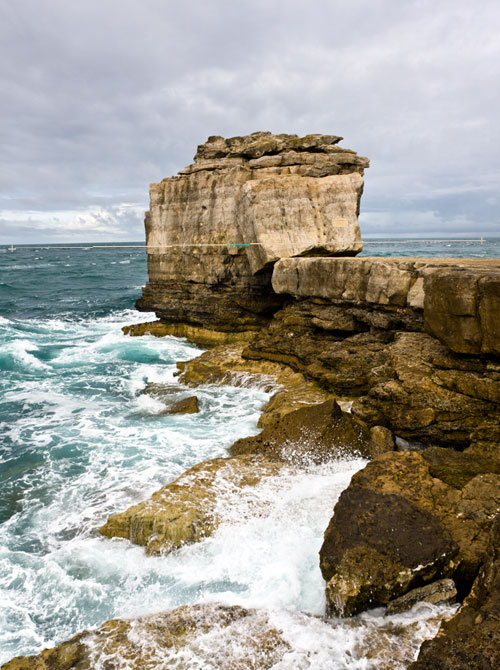
Figure 3 When an image is opened up in Photoshop, you may discover that it is not perfectly aligned. If an image doesn’t appear to be perfectly aligned, click on the Straighten button in the crop tool Options bar and drag along what should be a vertical or horizontal edge in the photo. This will rotate the image so that it appears to be perfectly level.
Straighening a layer
Alternatively, if you wish to rotate an individual layer, make the layer active, select the ruler tool and drag to define the edge you wish to appear straight. Then click the Straighten Layer button in the ruler tool Options bar (see Figure 4) to straighten.
![]()
Figure 4 To straighten a layer, select the ruler tool and again, drag to define the edge that should be straight. Then in the ruler tool Options bar click on the Straighten layer button to straighten the selected layer.