
Magic eraser tool
|

 |
Figure 1 The magic eraser tool Options bar.
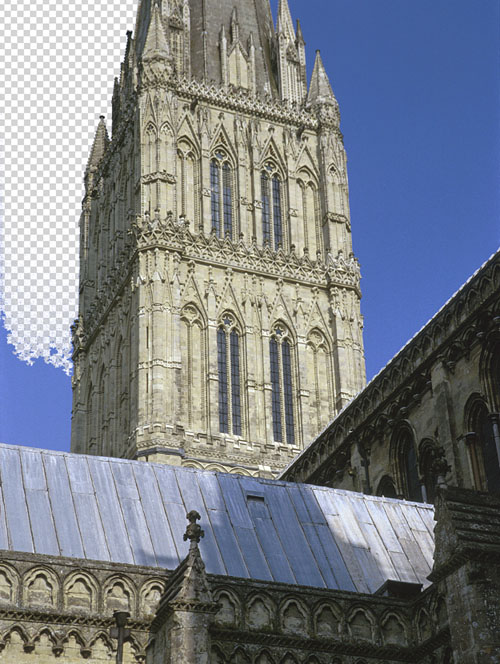 |
1 In this first example, I clicked with the magic eraser in the sky area about half way up to the left of the spire. The magic eraser options were set to Contiguous. This meant that only neighboring pixels which fell within the specified Tolerance setting (32) would be selected and then deleted by the magic eraser.
 |
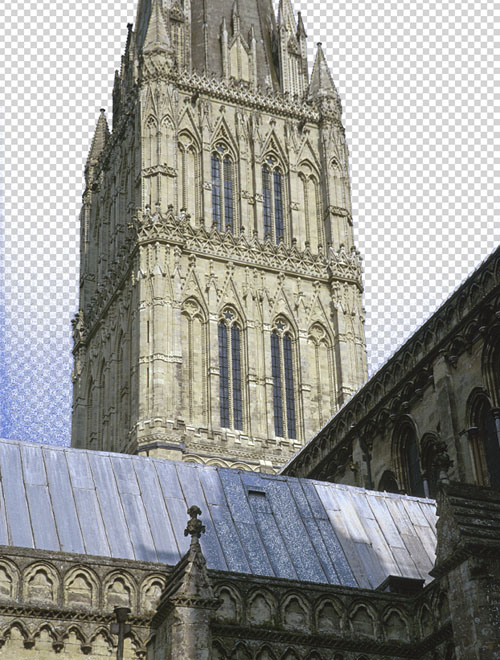 |
2 When the Contiguous option is deselected, all pixels with a color value within the specified tolerance will be deleted. In this example, I clicked with the magic eraser in the same position as example 1. Nearly all of the blue pixels are erased at a stroke, such as all the sky pixels to the right of the spire. But you will notice that this step also deleted some of the blue pixels in the shadows on the roof. This does not matter too much because one can always use the history brush later to restore any detail which becomes lost this way.