Adobe Photoshop CS5 for Photographers : The Ultimate Workshop


Color replacement tool

The color replacement tool is grouped with the brush and other paint tools in the Tools panel. You typically use this tool in Color mode. Just sample a color you wish to color with and paint over the area of the image you wish to colorize. You can control how the paint is applied by adjusting the settings in the Options bar (Figure 1).

The color replacement tool is suitable for use as a color aware painting tool for making localized color changes and the steps shown below were all done using the tool in ‘Color’ mode. This painting mode modifies the pixels, replacing the color and saturation with that of the foreground color, but the Hue and Saturation modes are also useful if you want to modify these color components individually.

In Sample Once mode, the color replacement will be based on where you first click and only the pixels within the specified tolerance will be modified. As with the magic wand, the tolerance setting determines the tonal range of pixels that will be modified. In Continuous mode, the sample source is updated as you drag through the image. In some instances this mode can produce smoother results, but as you drag, take care that the cursor cross-hair doesn’t stray outside the area you are modifying.

Limits can be set for the color replacement too. In the example shown below the Contiguous mode limited the tool’s application to the pixels that were within the tolerance range and are also adjacent to each other. In Discontiguous mode you can paint beyond isolated groups of pixels.

Figure 1 The color replacement tool Options bar.

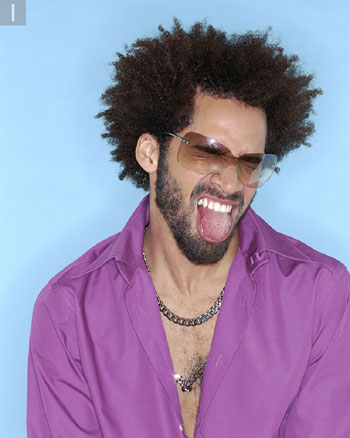
1 There are various ways one can change the color of an object. The color replacement tool offers a simple easy-to-use solution. I began by selecting it from the Tools panel (you will find it grouped with the brush and other painting tools).

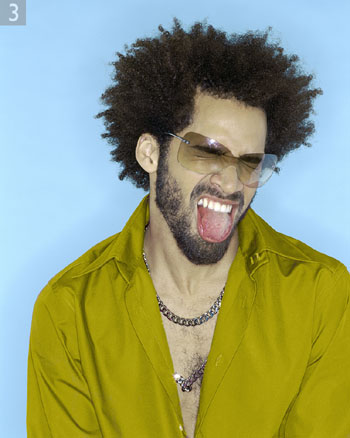
2 Here, I wanted to change the color of the purple shirt. I double-clicked the Foreground color in the Tools panel. This opened the Color Picker dialog and I selected a dark yellow as the new foreground color. The color replacement brush was set to work in Color mode with the sampling set to Once, which meant that the brush would start replacing the color based on the color of the pixels I clicked on first.


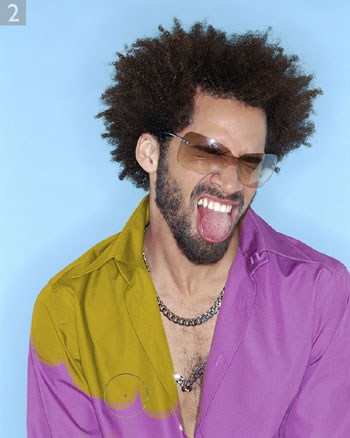
3 The color replacement tool limits in the Options panel were set to Contiguous. This meant that I was able to use the brush to click and paint over the left-hand side of the shirt in one action. Because the shirt was undone, there were no contiguous pixels to allow me to carry on painting the other side of the shirt. So I clicked again and painted with the brush to complete the color replacement.

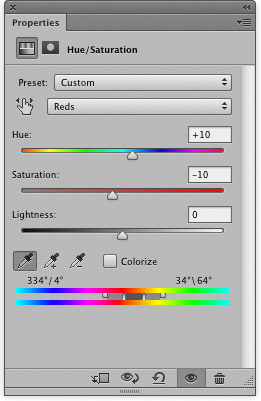
As is explained in chapter 5, you can also use the Hue/Saturation image adjustment to make selective color corrections. In this example, I added a new Hue/Saturation image adjustment layer, selected Reds from the Edit pop-up menu and adjusted the red component of the underlying image such that the skin tones were made more yellow and less saturated.