
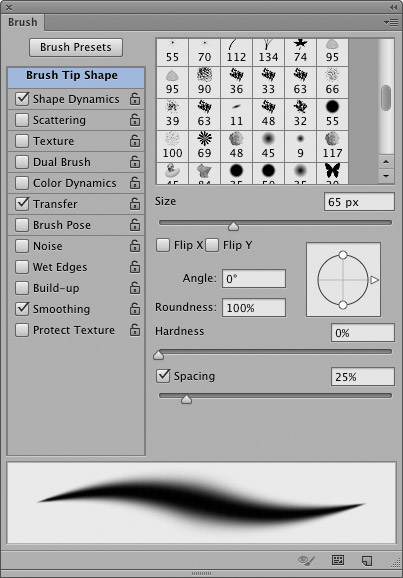
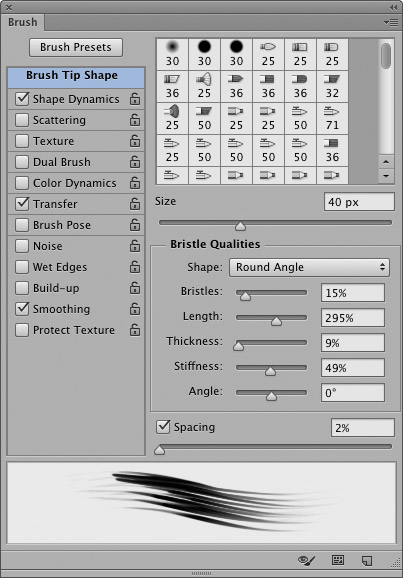
Brush panelThe Brush panel is used to define the brush attributes for the brush tip shape as well as things like how the opacity of the brush is applied when painting. In the default view the Brush panel displays the Brush Tip Shape options shown in Figure 1. Note, if you select one of the bristle tip brush shapes you will see slightly different options as shown in Figure 2.
Figure 1 The Brush panel brush tip shape options for a standard, static brush shape.
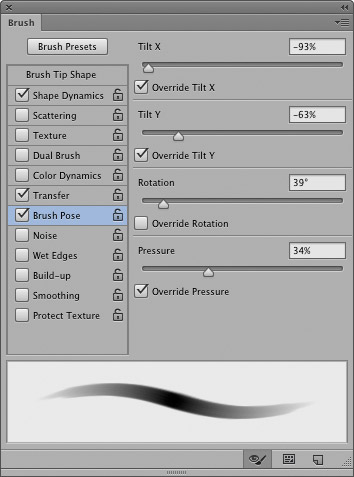
If you click on any of the items listed below where it says 'Brush Tip Shape' this reveals brush panel options such as those seen in Figure 3, where the right hand section changes to reveal the various options settings.
Figure 3 This shows the Brush panel options for the Shape Dynamics. Brush panel optionsIf you are using a pressure sensitive pen stylus, some of the options in the Brush panel enable you to link the pen pressure or other graphic tablet options to the various brush attribute settings (see the painting example shown in Figure 4). You can also lock specific brush panel settings, such as the Shape Dynamics. If you do this it means that the Shape Dynamics settings (for example) will always remain fixed whenever you select other, different brush presets. The following notes and tips on working with the Brush panel will apply to most, but not all of the painting tools. The Jitter controls will introduce randomness into the brush dynamics behavior. Increasing the opacity jitter means that the opacity still responds according to how much pen pressure is applied, but there will be a built-in random fluctuation to the opacity that will vary even more as the jitter value is increased. The Flow setting governs the speed at which the paint is applied. To understand how the brush flow dynamics work, try selecting a brush and quickly paint a series of brush strokes at a low and then a high flow rate. When the flow rate is low, less paint will be applied, but more paint will be applied if you increase the flow setting, apply more pressure, or paint more slowly. Other tools like the dodge and burn toning tools use the terms Exposure and Strength. Essentially these have the same meaning as the opacity controls. The Shape Dynamics can be adjusted to introduce jitter into the size angle and roundness of the brush. And the scattering controls enable you to produce broad, sweeping brush strokes with a random scatter. The Color Dynamics let you introduce random color variation to the paint color. The foreground/background color control can be useful as this will let you vary the paint color between the foreground and background color, according to how much pressure is applied (see Figure 4). The Dual Brush and Texture Dynamics can introduce texture and more interactive complexity to the brush texture (it is worth experimenting with the Scale control in the Dual Brush options). The Texture Dynamics utilize a choice of blending modes for different effects and of course you can add a custom texture of your own design, direct from the Pattern presets. Photoshop no longer has a separate airbrush tool. Instead, all the brush tools have an airbrush mode button in the Options bar (see the brush tool options bar view shown in Figure 5 below).
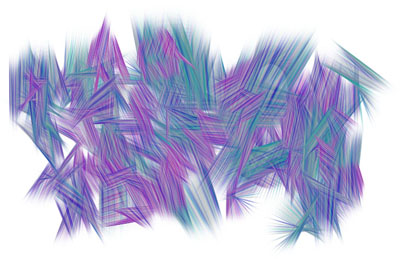
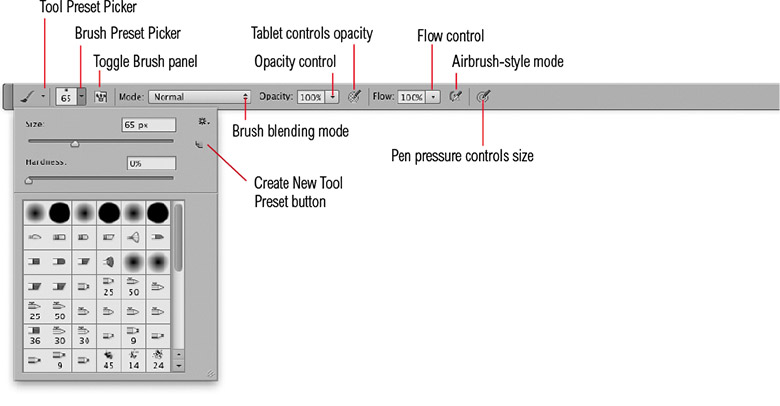
Figure 4 In this example, I selected a brush preset called Aurora and experimented with the pen tilt settings for things such as the size and angle in the Shape Dynamics settings. I then set turquoise as the foreground color and purple for the background. I used a pen pressure setting to vary the paint color from foreground to background. I created the doodle in this image by twisting the pen angles as I applied the brush strokes. When you have finished adjusting the Brush panel dynamics and other settings, you can save combinations of the brush preset shape/size, Brush panel attribute settings, plus the brush blending mode (and brush color even) as a new Brush tool preset. To do this, go to the Tool Presets panel and click on the New Preset button at the bottom. Or, you can mouse down on the Tool Preset Picker in the Options bar and click on the Create new tool preset button. Give the brush tool preset a name and click OK to append this to the current list. Once you have saved a brush tool preset, you can access it at any time via the Tool Presets panel or via the Tool Preset menu in the Options bar (Figure 5).
Figure 5 Mouse down on the arrow next to the brush shape icon in the Options bar to call up the Brush Preset Picker shown here. To add your current brush size and hardness as a new setting, click on the Create a New Preset button shown here. |
 Define Brush Preset. Name it and it will become appended to the current brush presets. To make sure that the brush shape remains permanently saved, choose Edit